Resource center
The resource center is an always-on, contextual and personalized help widget.
It empowers your users to find help on their own, directly in your app.
Table of contents
- How the resource center works
- Creating a resource center
- Block types
- Conditionally display a block
- Conditionally show resource center
- Global search
- Theming
- Custom resource center launcher
How the resource center works
Once you have created and published your resource center, a subtle, but easy-to-find help icon button appears in the corner of the page.

When users click it, it expands to a list of customizable blocks, such as free-form messages, knowledge base search, list of flows, and custom actions:

Creating a resource center
Resource centers are created, managed and published just like other Userflow content such as flows and checklists:
- Go to Resource centers in the sidebar.
- Click Create resource center.
- Give it a name and click the Create resource center button.
You’ll now see the resource center builder:

The resource center consists of a list of blocks, which you can edit at will. It comes pre-populated with some example blocks.
Click a block to edit its settings (e.g. name or icon) in the right side panel that will appear. You can also delete a block there.
Click Add block in the bottom to add more blocks.
Click Preview to see a live preview of the resource center running inside your app.
When you’re ready, click Publish to let real users see your resource center.
You can optionally control when the resource center should appear under Only show resource center if. This is useful if it should not show up on certain pages, or if it should only show for certain users. You could even build multiple separate resource centers if you have different user types.
Block types
We support several block types, each with their own functionality.
Checklist block
We recommend always having a Checklist block in your resource center.
When the Checklist block is present, a user’s active checklist will automatically be embedded inside the resource center.

The checklist’s text and number of uncompleted tasks (if any) will also show in the resource center launcher:

If you don’t include a Checklist block in your resource center, the checklist will work stand-alone and be displayed next to your resource center by default:

List of flows/checklists block
The List of flows/checklists block enables your users to find and start flows and checklists on demand. When users click it, it’ll show a searchable list of flows:

If you click the block in the builder, you can edit its icon and name, and select which content items should be listed:

Note: Content items are by default not included in the resource center. You must add each individual item you want to list. This is to avoid exposing secret content inadvertently.
You can either let the list be sorted alphabetically, or switch from Sort alphabetically to Sort manually and drag and drop items to reorder.
You can optionally override items’ public names in the resource center. Go to an item’s builder, click Show advanced settings and look for Public name in resource center.

Knowledge base block
The Knowledge base block enables your users to search your existing knowledge base without leaving your app.

Clicking a search result will open the article in a new tab. There’s also a link button in the top, which takes the user to your knowledge base frontpage.
We currently support searching directly in the following knowledge base providers
Public/Unauthenticated search
- Freshdesk
- HubSpot
- Zendesk
Authenticated search
- Intercom
- Zendesk
For all other knowledge base providers or home-built docs sites, you have the following options:
-
Google Search: Provides similar results to google.com when searching for
site:yourdomain.com/path. This requires that your site is indexed by Google. - AI Assistant: If you’re using our AI Assistant, you can utilize its sources for searching. This requires that your assistant is trained and published. You do not have to use the assistant for AI chat, so if all you want is knowledge base search you can also use the assistant like this. Searching via the assistant does not cost you anything. Using the AI assistant as a source also allows you to do authenticated search in Salesforce knowledge bases
Choose your Knowledge base provider and Knowledge base URL in the builder’s side panel:

Contact block
We recommend putting a Contact block at the bottom of your resource center. It’s a great way to let users know how to contact you.

When users click the Email or Phone icon, they’ll see a page with information with e.g. your email address:

When they click on the Chat icon, the resource center will close and your live-chat provider will be activated:

Click the Contact block in the resource center builder to customize which of the Email, Phone and Chat options should be displayed, edit the text to display, and choose your live-chat provider:

The resource center currently integrates with the following live-chat provider options:
- Crisp
- Freshchat
- Help Scout
- HubSpot
- Intercom
- Zendesk
For all other chat providers you can build a custom chat connection using javascript.
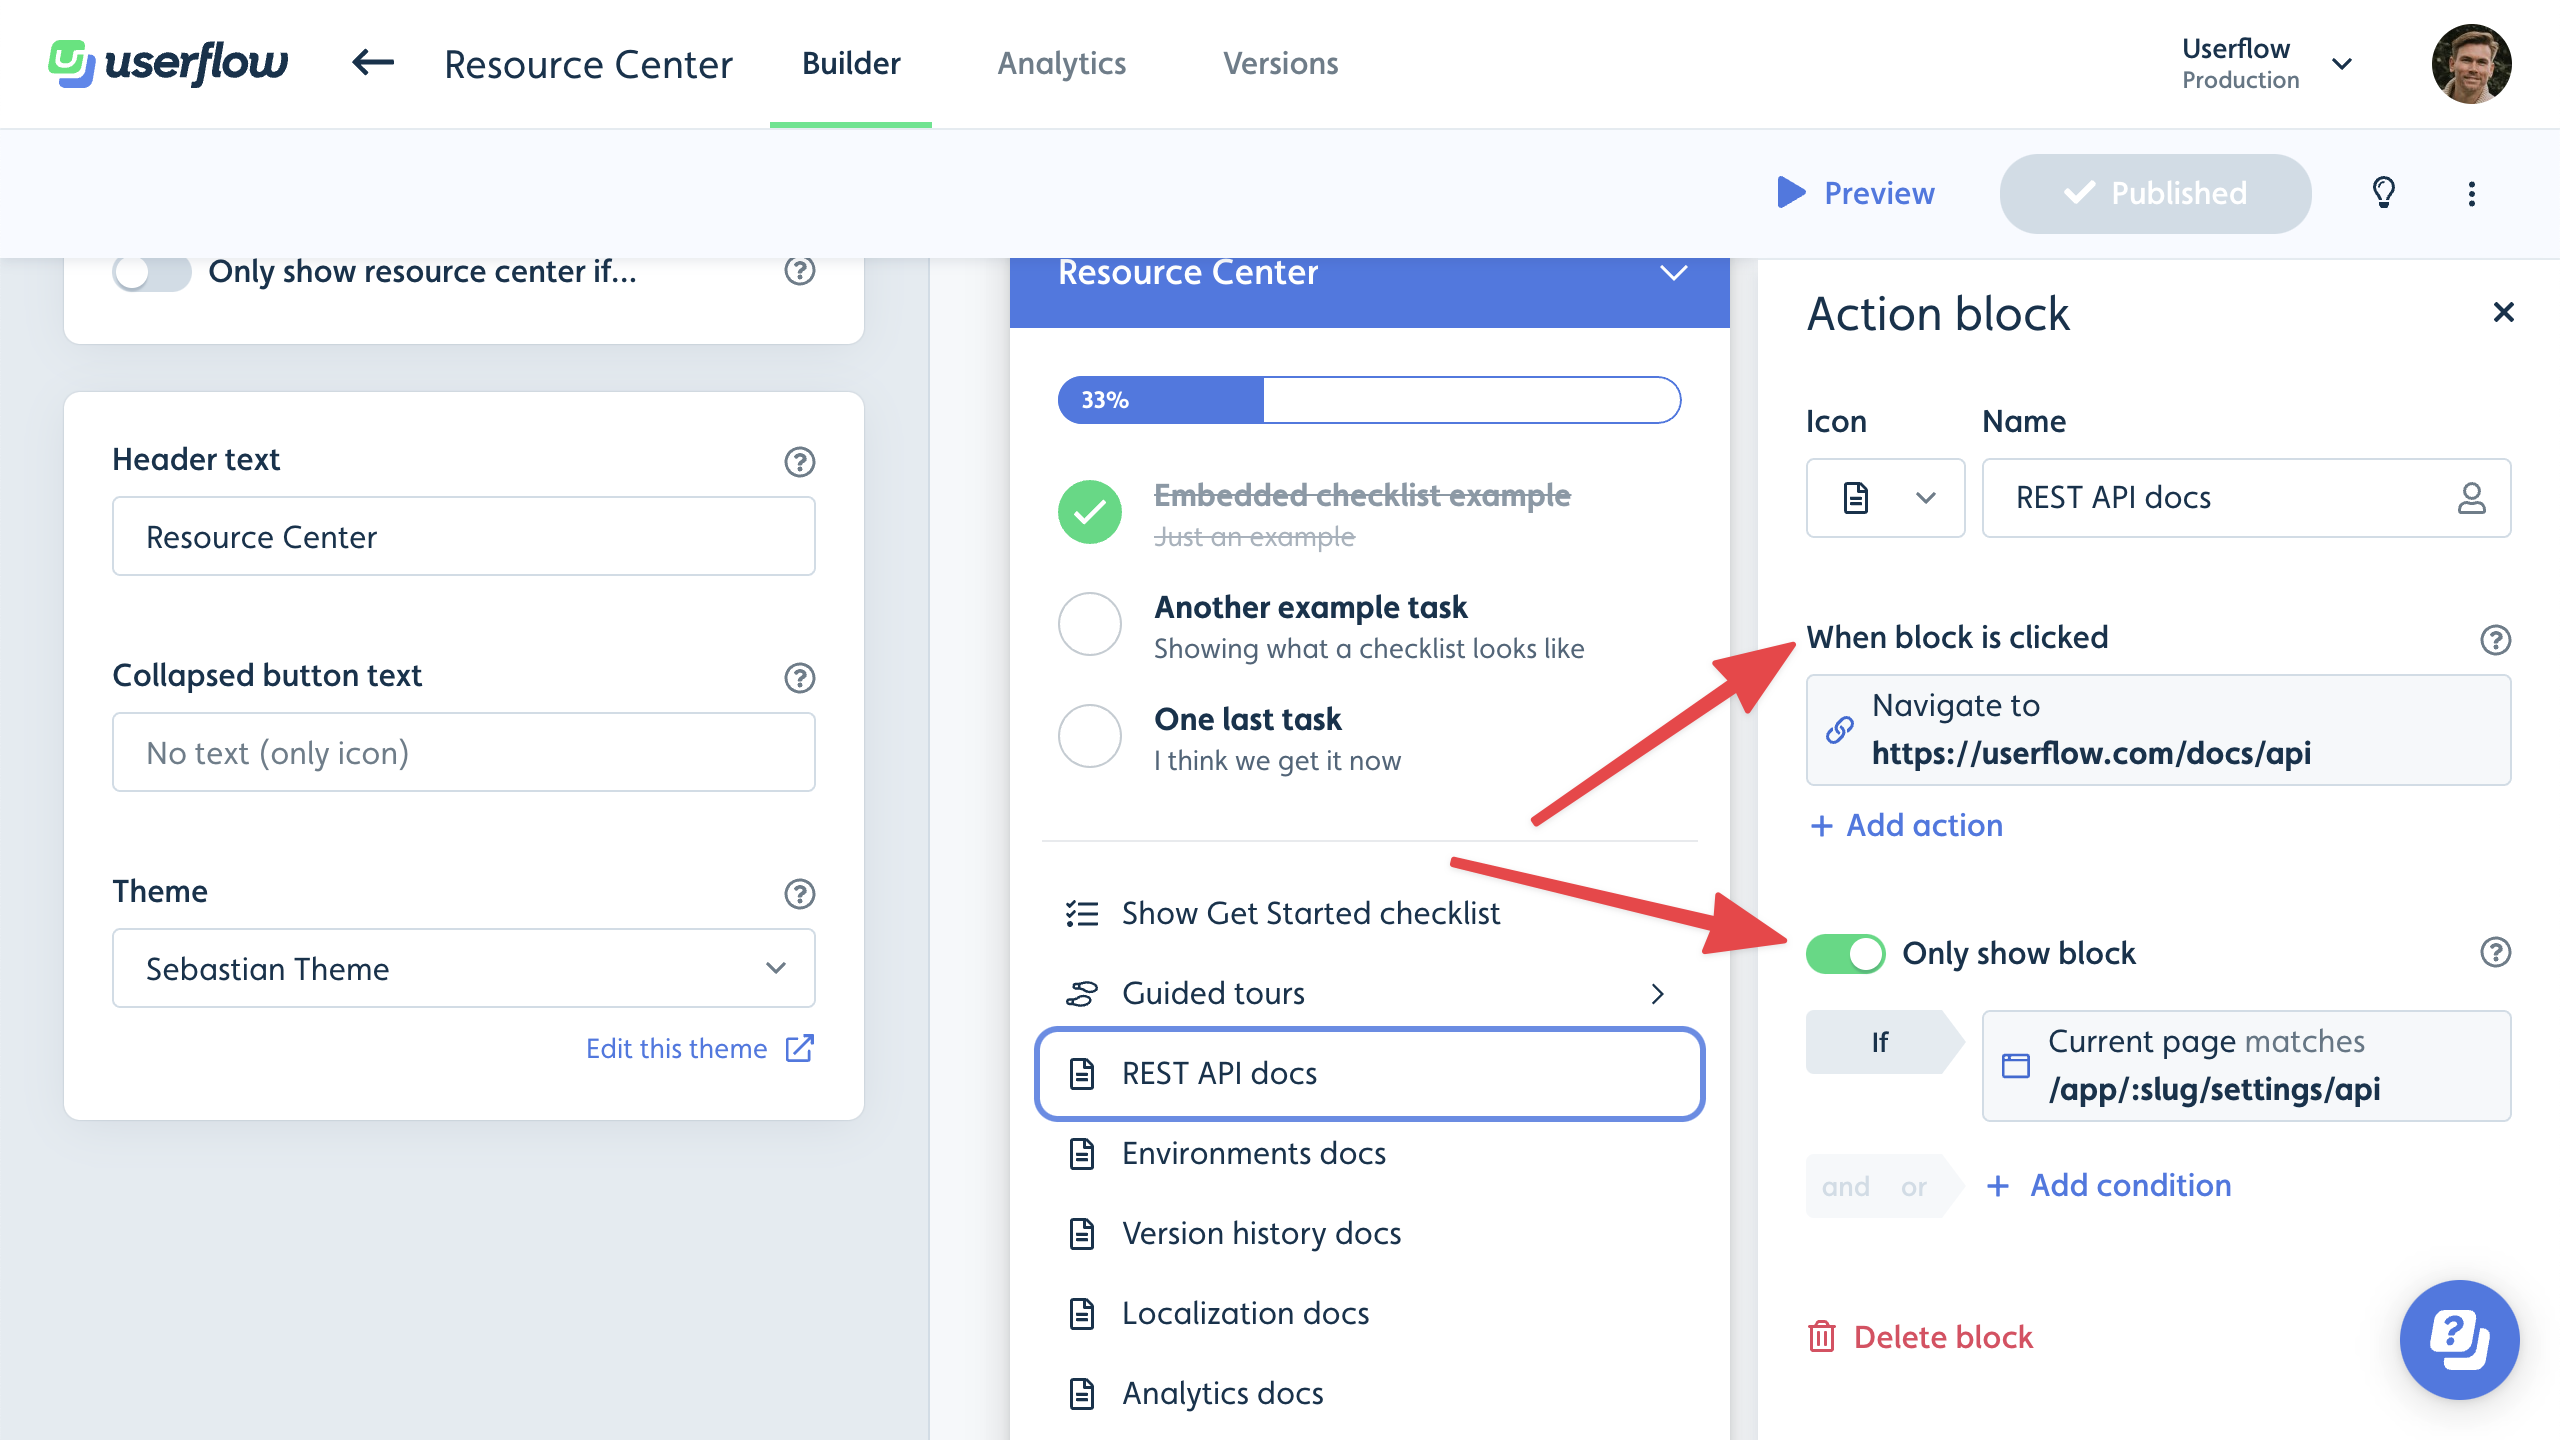
Action block
Action blocks are great for any kind of custom action you want users to be able to do in the resource center. It works kind of like a button in a flow. The block’s actions will be performed when a user clicks the block:
You could have an Action block navigate the user to a page, start a specific flow/checklist, or perform some custom JavaScript, which can do whatever you need.

Message block
If you want to display a free-form message, such as an announcement or a greeting, in your resource center, then Message block is for you.

Sub-page block
If you want to display a larger free-form message, such as a list of resources or an embedded video, in your resource center, then use a Sub-page block.

When the user clicks the block, the Sub-page content will be displayed in a nested route with a Back button.

Announcements block
Announcements in Userflow let you update users about new features, fixes, events, and more, all within the resource center.
Read more in the Announcements guide.
AI Assistant block
AI Assistant delivers automated answers to your users’ questions within your app, leveraging your knowledge base and website, and powered by latest large language models.
Read more in the AI Assistant guide.
Conditionally display a block
You can make a block only show up if a condition is true using the Only show block setting.
A good example is if you have an Action block that (re)starts a checklist, then it’s a good idea to only make it show up if the checklist is not already active:

Another example is to conditionally show help articles on certain pages:
Conditionally show resource center
To conditionally show or hide the resource center you can toggle on the Only show resource center if conditions found on the left side of the builder. This can be used if you e.g. only want to show the resource center on certain pages or in cases where certain elements are present or not present. If the resource center is blocked by or blocked by an element it is however often better to adjust the z-index of the resource center (via theme settings).

Global search
If your resource center has at least 1 searchable block (currently, only Knowledge base and List of flows/checklists blocks are searchable), a global search icon will appear in the top:
![]()
Clicking it and searching will search across both flows in your Userflow account and articles in your knowledge base:

Theming
Under Settings → Theme you can customize the look of your resource center.
Use the Base colors section to quickly adjust the colors. Read more in our Themes guide.
Use the Resource center section to control which corner the resource center should appear in as well as its sizing and padding. You can also change the resource center launcher appearance, i.e. if it should have the default icon or a plain text question mark, as well as if it should show the active checklist text, the resource center launcher text or no text at all.

Custom resource center launcher
If you want to render your own custom resource center launcher, e.g. by adding a menu item in your own app, you can disable the default launcher, and programmatically control the resource center via Userflow.js.
See Resource center in the Userflow.js docs
Note that with a custom resource center launcher, you will still be able to show the number of pending checklist tasks for an embedded checklist and/or number of new unread announcements. This is done using the getResourceCenterStateMethod.
