HubSpot
The Userflow-HubSpot integration syncs HubSpot properties to/from Userflow in near real-time. This allows you to personalize onboarding content in Userflow based on data from HubSpot.
Userflow-generated events, such as Flow Started and Checklist Task Completed, are continuously streamed into HubSpot as Timeline Events, which you can see on contacts’ profile pages and use in automated workflows. This way you can e.g. send emails from HubSpot based on how your users interact with Userflow content.
Details about how the integration works and how to set it up is found below. For additional general information and a demo video of the integration you can also see the HubSpot marketplace listing.
Table of contents
- How it works
- Quick note about HubSpot accounts and Userflow environments
- Setup guide
- Stopping the integration
How it works
You can set up “object mappings” between HubSpot objects and Userflow users/companies. For example between HubSpot contacts and Userflow users, or HubSpot companies and Userflow companies. Fields (which is the common word here for “properties” and “attributes”) can be synced in either direction. This means you can both bring HubSpot fields into Userflow, which you can then use to target flows, and you can bring Userflow fields into HubSpot, such as passing NPS responses from Userflow into HubSpot.
We support the following HubSpot object types:
- Contacts
- Accounts
- Deals
- Custom objects
The integration will match a HubSpot object with a Userflow object through the ID fields you select. For example, match HubSpot contacts with Userflow users via their email address, or via an ID property (a HubSpot property that matches the same ID you use in Userflow.js - typically these IDs come from your own backend’s database).
Objects are immediately synced when they’re created/updated in either HubSpot or Userflow.
The sync happens in near real-time! This means that any user seen by Userflow, will always have up-to-date properties synced from HubSpot. The delay varies depending on in which system the change happens. When anything changes in Userflow, count on a delay of less than 1 second. When changes happen in HubSpot, they’re typically reflected within 3-10 seconds. There’s no periodic job that you have to wait for.
Objects are only synced if they exist in both systems. The integration will not create any new objects in either system. This means if you e.g. have a large number of newsletter-only contacts in HubSpot, then we won’t sync these into Userflow.
HubSpot properties can be seen on user/company profiles in Userflow and are marked with the HubSpot sprocket icon:

You can use them in auto-start conditions to target users based on properties from HubSpot:

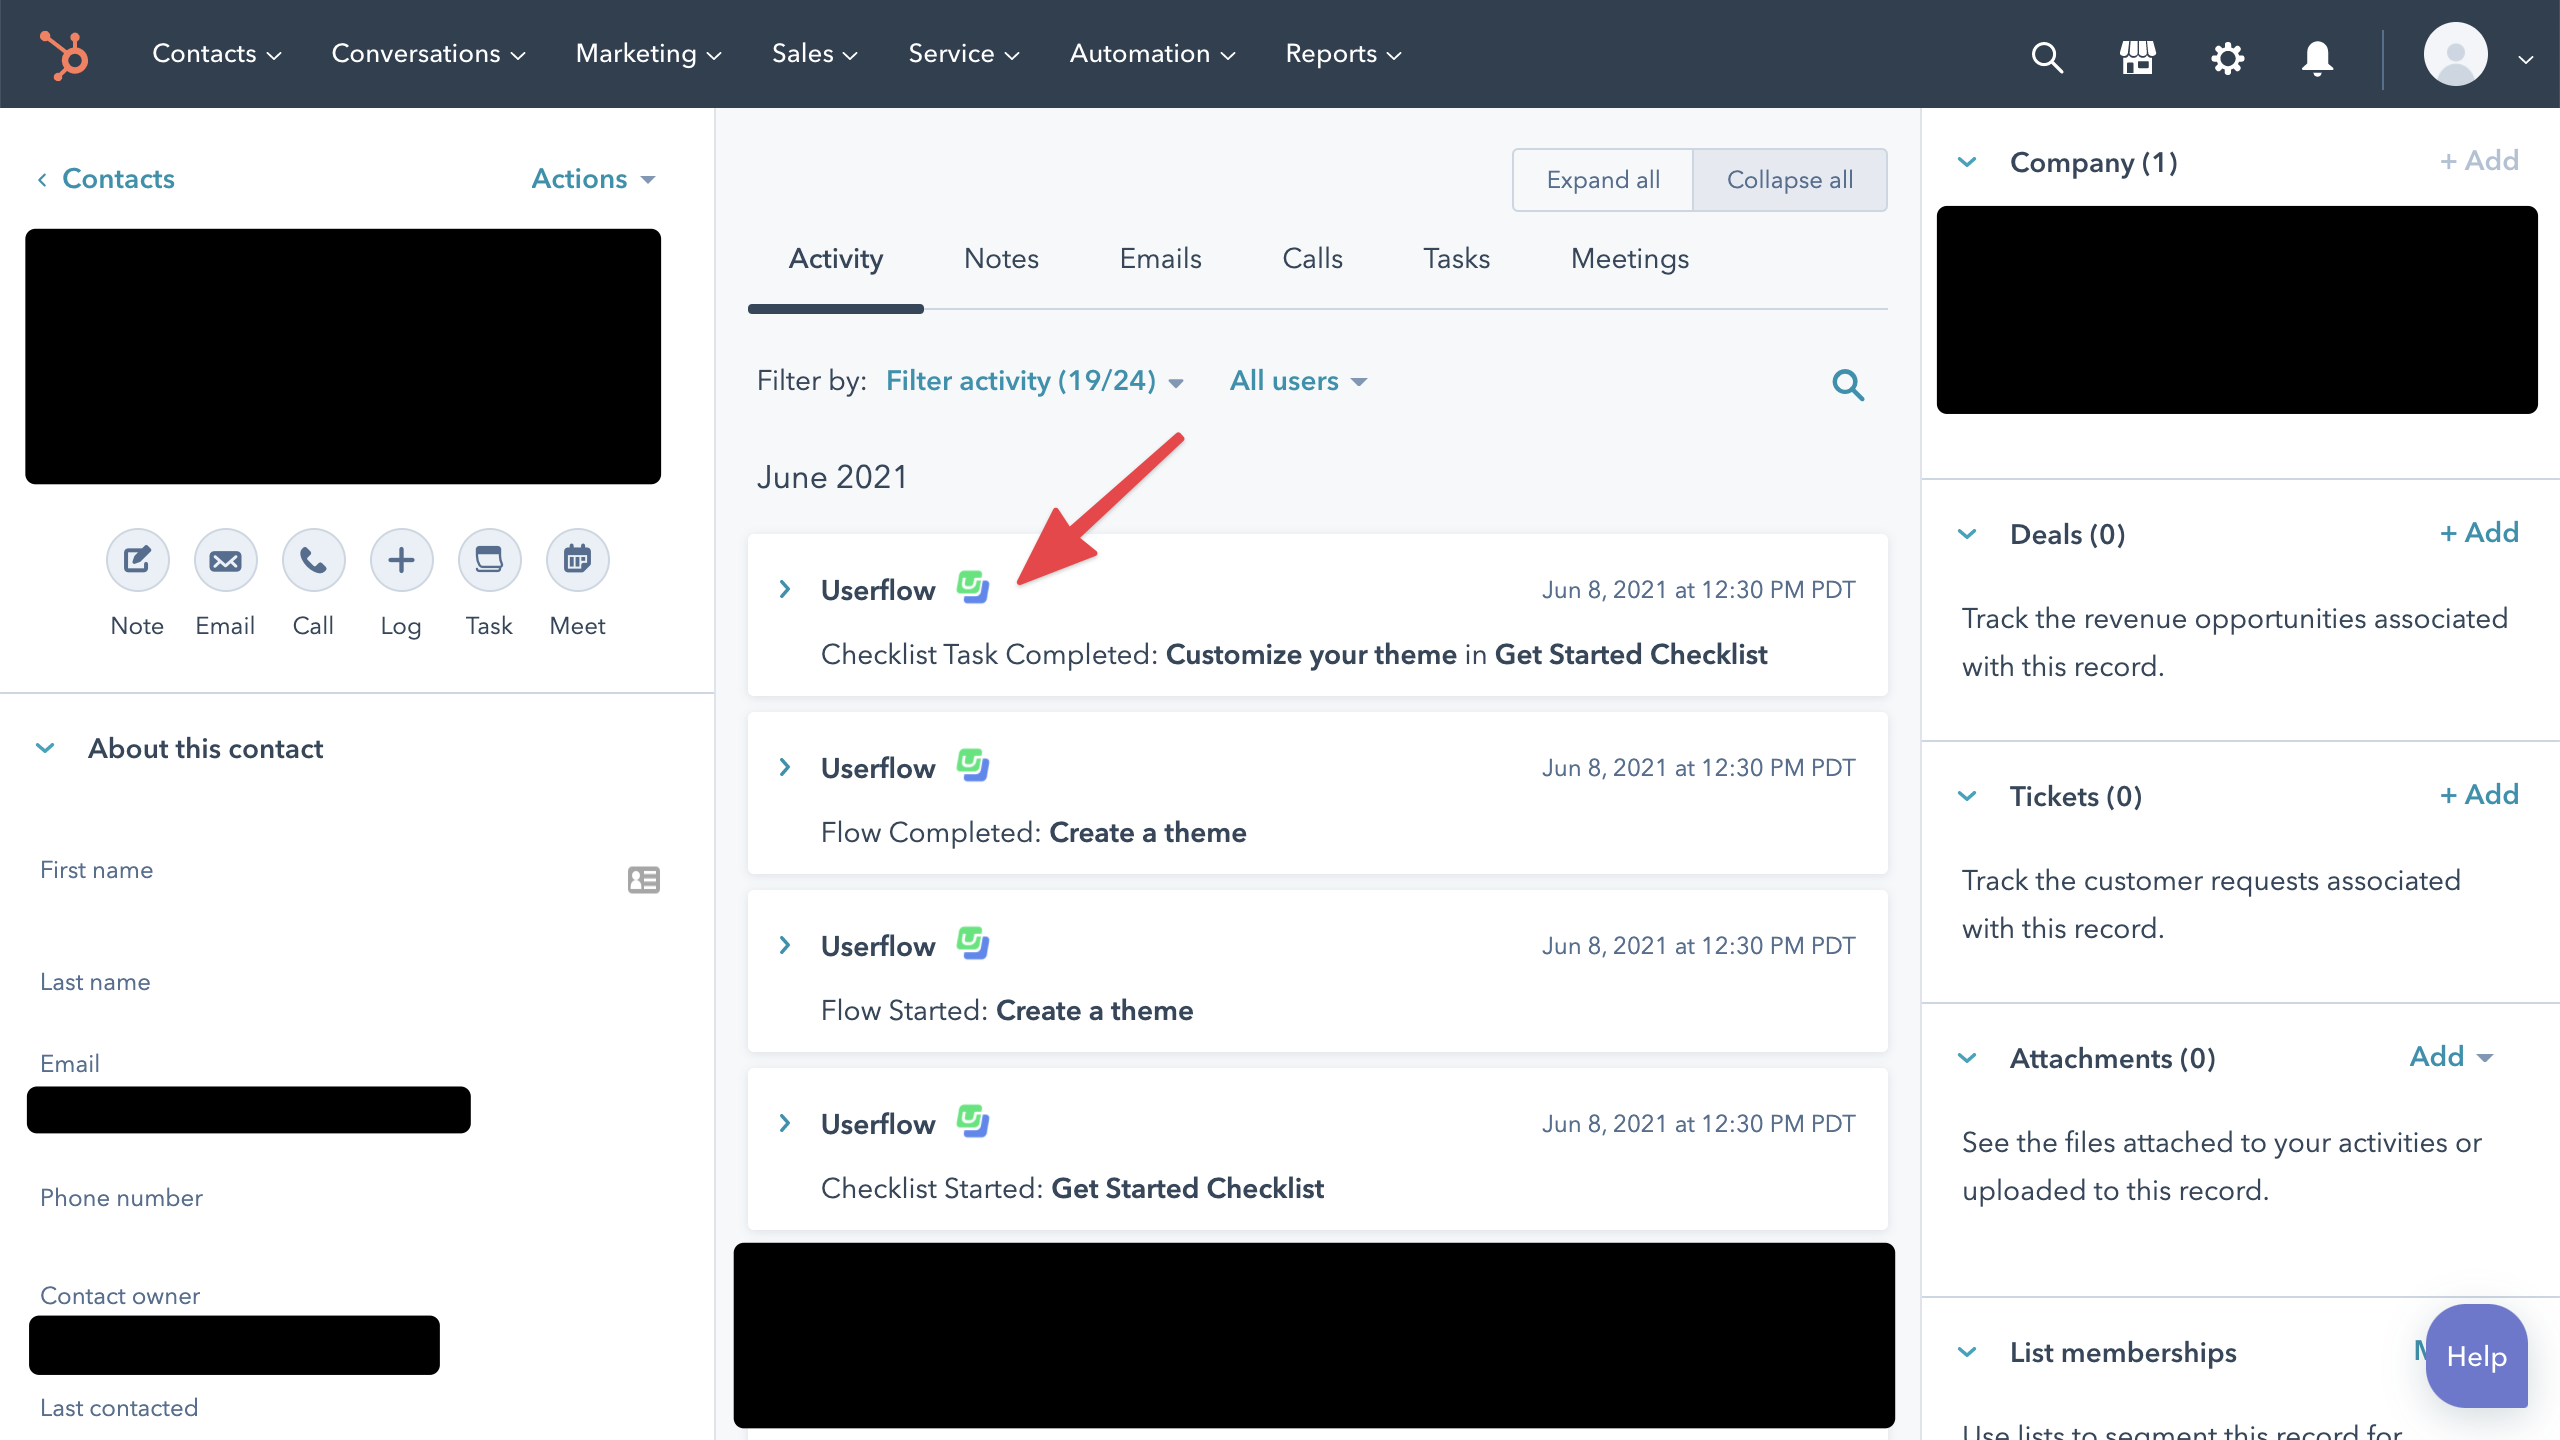
If enabled, when certain events are tracked by Userflow, such as when a flow is started or a checklist task is completed, they’ll be posted on contacts’ and companies’ Activity tabs in HubSpot. First enable Userflow activity via the Filter activity button:

Then they’ll appear like this:
You can also use these events in workflows, for example to send an email when a user completes a checklist task:

You can even filter on event attributes, such as the name of the checklist task that was completed:

Quick note about HubSpot accounts and Userflow environments
A Userflow-HubSpot integration is between a single Userflow environment and a single HubSpot account. You have to run the below setup guide for each environment.
We recommend only integrating your Main/Production HubSpot account with your Production Userflow environment.
If you have a Staging Userflow environment, where you want to test the HubSpot integration, then make sure to create a different HubSpot account. Otherwise the Userflow Staging environment may post timeline events in your main HubSpot account.
Setup guide
- Sign into Userflow and use the top-right company/environment menu to navigate to the environment you want to integrate with HubSpot.
- Go to Settings -> Integrations. Then click Add integration:
- Find and click HubSpot in the list:
- Click Add HubSpot (activate/upgrade your plan if you don’t yet have access):
- Click Connect with HubSpot. In the popup window that opens, pick the HubSpot account you want to sync with the current Userflow environment.
- Next, we have to tell the integration how to map HubSpot objects to Userflow objects. Click Set up a new mapping between HubSpot and Userflow objects.

- In the dialog that appears, pick the HubSpot object type and the Userflow object type you want to sync. For example: HubSpot contacts and Userflow users. Then click Continue.

-
Choose how we should match objects from HubSpot with objects in Userflow.
-
If you’re syncing HubSpot contacts with Userflow users you can have 2 options:
- Via email address, where a HubSpot contact’s email address must match a Userflow user’s email address. Pick “Email” in both dropdown fields.
-
Via a HubSpot ID property, which must match the user ID your Userflow.js snippet passes to
userflow.identify(userId). This requires your own integration between your own backend and HubSpot to store this user ID as a contact property in HubSpot.
-
If you’re syncing with Userflow companies:
-
Requires your Userflow.js installation to call
userflow.group(companyId), and the selected HubSpot company ID property must match this samecompanyId.
-
Requires your Userflow.js installation to call
-
If you’re syncing HubSpot contacts with Userflow users you can have 2 options:
- Choose the fields you want to sync from HubSpot to Userflow. Note that you’re also able to pick fields from associations of the mapped HubSpot object. For example, when syncing HubSpot contacts, you can pick company fields in the dropdown, too. The integration will simply grab the value from the contact’s company.
-
Choose the fields you want to sync from Userflow to HubSpot. Once you save, appropriate properties prefixed with
userflow_<object>_will automatically be created in HubSpot under a property group named “Userflow”. - If you want Userflow to post timeline events to HubSpot objects’ Activity tab, when e.g. flows are started or checklist tasks are completed, then switch Stream events to ON. Note that only some HubSpot objects support receiving events.
- Finally, click Save mapping.

- Userflow will now sync with HubSpot every time objects are created/updated either system. But! Existing objects have not yet been synced. Click Run full sync to start an initial full sync of all objects.
- The UI shows you a running progress, and a green checkmark when it’s done. If you change your mappings later, we recommend running a full sync again to make sure all existing users are in sync. We also run this full sync periodically (currently every ~24 hours), just to make sure we didn’t miss any updates from HubSpot.

- You can of course add multiple object mappings. E.g. HubSpot contacts <-> Userflow contacts and HubSpot companies <-> Userflow companies.
Stopping the integration
- Find your HubSpot integration in Userflow under Settings -> Integrations.
- Click the three-dot button in the top right.
- Click Disconnect. Event streaming and property sync will stop immediately.
- Finally, uninstall the Userflow app in your HubSpot account by following HubSpot’s instructions here.
