You can now build Checklists in Userflow!
Checklists work great as the anchor of new users' onboarding experience. If a user leaves your onboarding guide, they always have a chance to get back - or to pick other tours - using the checklist. Giving users a sense of progress also gives them a sense of fulfillment, which they'll hopefully chase and get even more involved with your product.
How to build checklists
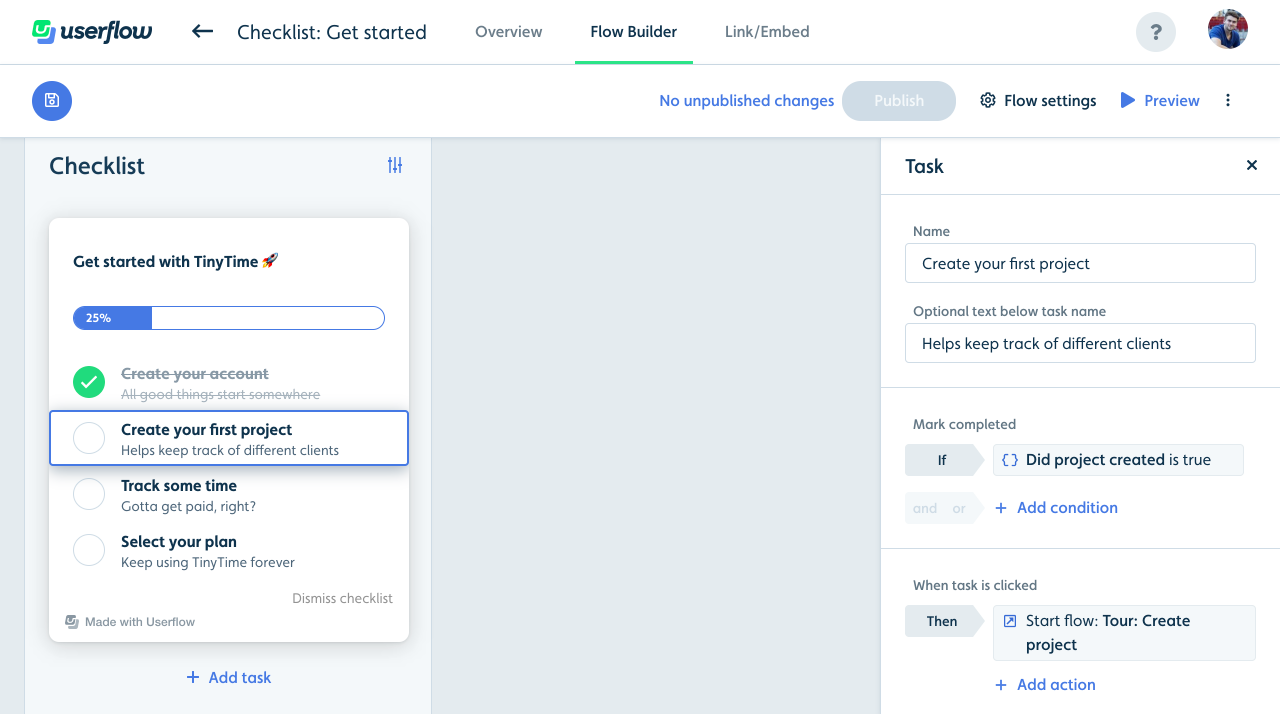
Checklists are created just like regular (step-based) flows, using the New flow button in Userflow. Just pick the new Checklist type here. Checklists work in general a lot like regular flows, in that they can have auto-start conditions, are published and show up in your app through Userflow.js (no extra installation required).

Checklists contain text (rich content) at the top.
There's a progress bar, which is automatically updated as users complete tasks.
You can add as many tasks as you want. Each task has a name, an optional subtitle, a completed condition and one or more actions. Example: Completed condition could be when users have created their first project in your app, and the action could be to start a tour showing the user how to do so.
What users see
Once a checklist is triggered for a user, it appears in the lower right corner (by default).

When a task is clicked, it's actions, such as starting a tour or navigating to a page, are performed.
If the user minimizes it, a launcher button (saying "Get started") appears in the same corner, containing a circle with a number representing the number of tasks left to do.
When the user completes a task, the checklist is automatically shown and its checkmark is checked with a cool animation.
Bonus: New flow condition
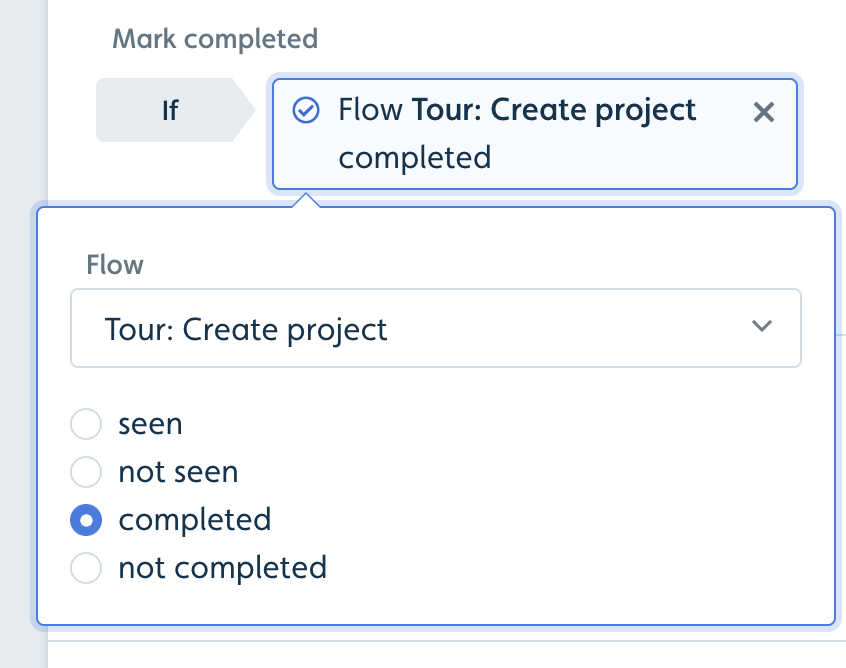
To mark tasks as completed when users have seen or completed a flow, we've added a new condition type:


.png)


